Version Control in VS for mac together with Sourcetree.
It is also a painful experience when you try to use the Version Control from VS for Mac. Some people even describe it as a junk. I would say, it is sufficient to do a common stuff such as check out, commit, push, view logs, blame,.. but not Merge. It is a basic tool which you might encounter a lot of issue when you need to manage multiple branch, merging the changes from different branches, as well as resolve the conflict and so on. Right, this article is not able how good or bad it is. It is all about how to use it together with SourceTree.
Well,
Pre-requisition
1) Your remote repository URL.
Let's start with the assumption that you already have a remote repository setup somewhere, either in GitHub, or VSTS, etc. Mine is in VSTS. Get ready your remote repository URL by just clicking on the clone button from your remote repository portal site first.
2) Install Sourtree from the following website: https://www.sourcetreeapp.com
Get an account from sourcetree. Just to ensure you are allow to you the tool. Do not connect to any of its given hosted account (remote Git repo, such as BitBucket, GitHub, etc). (Unless you haven't had any remote repo yet).
PART1:
1) First thing first, Setup A local repositorya) I started with create empty folder called "MyTestProject" in my local machine. This will become my project folder that going to match with the project in remote repo.
b) In SourceTree window, click on 'Local'.
Note: 'Remote' will basically allow you to create a connection to hosted account such as BitBucket, etc)


Instead of choosing 'Clone from URL', start with 'Add existing Local Repository'.
In this case, I will choose the folder I just created "MyTestProject".
Immediately after this, you will see a prompt with title 'Create a local repository' window.
Keep whatever setting it is,.. then click 'Create' button.
Done! You have the local repo setup. (Later on, this will be the project folder you need when you are in VS.)

2) Next, Link your local repository to the remote repository
a) Double click on the project name 'MyTestProject' from the above image. This will load another window on the screen:

b) Setup the remote repository: Click on the 'Repository' tab from the main window bar. Then choose 'Repository Settings'. After that choose 'Remotes'. See the image as below. And, finally click on 'Add' button.

c) Provide a remote name and the URL. (The clone URL from the remote repo).

d)Now, you have your remote repo setup. To your remote repo,...
Mouse over the REMOTES menu on the left, click on the little 'show' menu next to it. (It toggle in between show and hide).

And, there is nothing under the 'REMOTES' menu apart from my project name.
So,. the next action will be...
e) Fetch your branches from remote repo. At this point, we haven't check out all file from the remote branch yet!
Right click the project name. (My case will be... right click on the 'MyFirstProject'.. then choose 'Fetch from my FirstProject'. ) Due to the reason I already have 2 branches exists in my remote repo (1 called master, and another one called staging), therefore I have 2 listed under my project.


g) Once you've done the above step. You should see your branch appear in 'BRANCHES' menu:

Double check the check out files from your Finder. You should have a copy of your remote file in your project folder now.
Part 2:
Continue the setup in VS for Mac
In Part 2, what we try to achieve is to make use of the existing version control, to work together with the version control from SourceTree. It will ultimately produce a result where when you finished changing a file, you may either commit it via VS or SourceTree. Or, you can even push the committed files from VS or SourceTree. Wait... why we want to do that?
Well, when it comes to a situation where you think you like to merge or resolve some of the code conflict,.. instead of using the Version Control from VS for Mac, I will recommend you to use SourceTree to resolve it. That's the whole point.
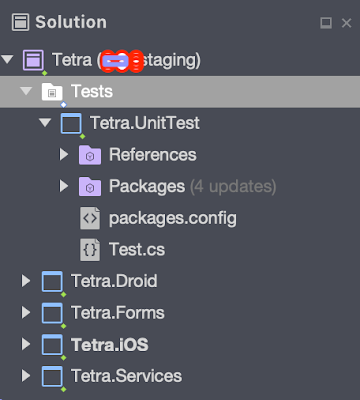
a) As usual, open you project solution via VS. First of all you shall see the branch name next to your solution name. Example: HelloWorld (master).
b) Click on version control --> Manage branches and remotes, then goto 'Remote sources tab'.

Click on Edit,.. paste the same URL that you got it from the Clone URL.
Next, Track the branch... :


Right all done!!
Part 3:
The magic in between SourceTree and Version Control
If you keep the source tree open, click on a branch under the 'BRANCHES' menu, will auto reflect the selected branch in VS. Try it...
Right,...
VS allow you to switch the branch from one to anther. For my case,.. I should be allowed to Switch from Master to Staging. However, I am hitting this error:
'Branch Switch Failed'.
String cannot be empty.
Parameter name: name.
To resolve this issue,..you have to make a changes to a file, commit it and push it. Then, this will be resolved automatically.
Part 4: Resolve conflict.
Whenever you hit a conflict, click on the conflict file, the choose external tool 'FileMerger' to resolve it.Remember, here is the step to resolve:
1. Choose which line you want, choose the action from the dropdown list.
The Left window is your changes. The right window is others.
2. Save it before you mark it as resolve.
3. Must mark it as resolve.

No comments:
Post a Comment